Category: Time-lapse Photography

6 key factors to consider when looking for a time-lapse photography expert

Time-lapse photography allows you to bring your project to life in a visual way. There are many different aspects and styles to photography, shooting conditions and various types of equipment required to deliver specific outcomes. This leads us into the first key factor for choosing your time-lapse photographer:

  1. Expertise – knowledge and experience in a specific field of endeavour is the most important thing. Can a construction time-lapse expert shoot your wedding? Yes, however, the photos are not going to look as good as a professional wedding photographer. Equipment, camera location/angle, lighting, camera settings, planning etc. are all different based on the job at hand. After a few minutes discussing your project or event you’ll soon gage the level of expertise of the person from the answers they provide to your queries, together with the questions they ask you.
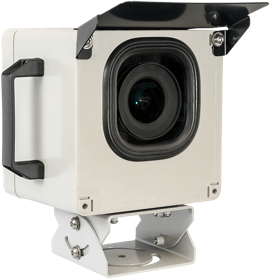
  1. Innovation – with advances in technology long term time-lapse photography now offers many more benefits than just creating a final video of your project. State-of-the-art equipment and online galleries allow you to view real-time activity during the project. Ensure your specialist is using the latest innovations that will assist you to save time, increase efficiencies and enhance capabilities to deliver projects on time and on budget
  1. Remote capability – For long term time-lapse you need to use technologies that allow the system to be monitored remotely, ensuring everything is operating correctly and images are being captured. Without these capabilities conducting a monthly site check of the system may find something has failed with no footage captured and therefore placing your investment at risk. It’s important to find out upfront if your time-lapse expert offer these features and how they apply to your project or event.
  1. Project Planning – one of the key factors when preparing for a time-lapse project is planning, even when putting a quote together. Important aspects are:
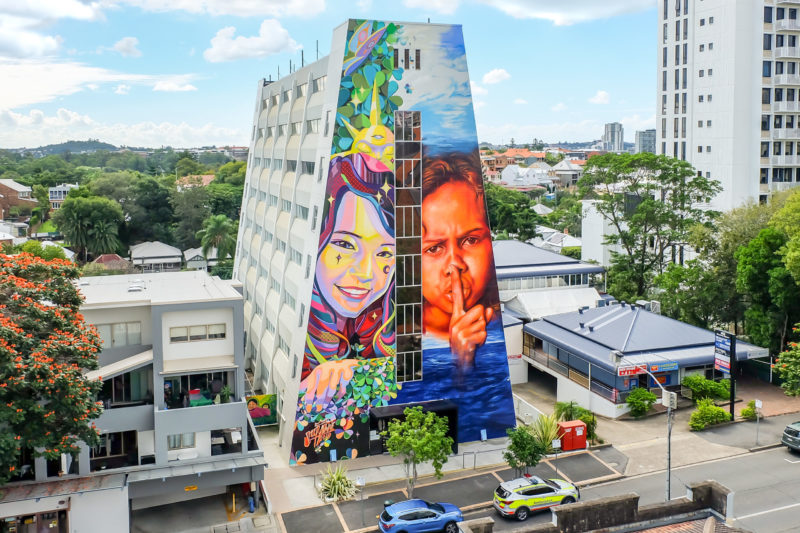
    • Camera Location – obtaining drawings from the client showing a site plan, layout, and elevations of the subject/s can be invaluable in determining where to place the camera to check its proximity to construction activity and its field of view.
    • Camera Elevation – can the camera be placed on existing infrastructure, adjacent buildings etc, is a pole required, or is setting up near ground level sufficient to capture what is required.
    • Desired Outcomes – important to know expectations as this will determine how the final product will be presented and will generally impact the shooting regime.
  1. Your time-lapse consultant should be asking these questions as each one of these can have a significant impact on the pricing and will also give you the confidence to discern you are talking to someone who knows what he’s doing.
  1. Portfolio – ask to review the photographer’s portfolio or samples. This can generally be viewed on their website but not all their work may be displayed which represents the type of project or event you have, or the outcomes you require eg. short & long term time-lapse projects have different requirements – day/night capture, lighting, what footage is required etc.
  1. Value for money – comparing a couple of quotes is important in the decision-making process but it shouldn’t be the only driver in you deciding on a time-lapse specialist. Make sure you are comparing like for like and also take into consideration all of the above factors to ensure you get your desired outcomes from the engagement, at a competitive price.

Each of these will be presented differently so ensure your chosen professional has the experience for your particular project or can demonstrate he can achieve the desired outcomes.

And don’t be afraid to ask questions, get to know him to ensure he can meet your requirements.

How to make the best use of your long-term time-lapse video when completed

The uniqueness about time-lapse photography is that it captures a whole event over time from start to finish and delivers it in a short video to engage your audience. Polish it with background music, branding and some dynamic text to tell a story and it becomes a resource to be utilised in many ways:

  • A marketing and promotional tool – for a media release, to pitch to a prospective client, place on your website portfolio and use on social media channels. This will:
    • add PR value to your business or organisation
    • encourage community engagement
    • assist business development by highlighting capabilities and efficiencies
  • Use internally within your organisation to promote unity and achievement and distribute to key stakeholders to celebrate the project’s success.
  • Use the footage to create other media:
    • use sections of it to incorporate into other media including interviews, ground and aerial footage to produce a comprehensive perspective of the project or event .
    • use for internal collaboration and for content in training videos to improve systems and educate staff.
  • The video is a record of key milestones achieved throughout the project or event – gives you an exact timeline for historical reference and as a legacy to the company & community
  • Share with Stakeholders & investment partners – an impressive way to provide key stakeholders with a visual depiction of the entire project so they are able to see firsthand the progress and status of the project
  • Showcase at launch or client events – wow factor at your launch or sales event
  • To market the development or finished project to potential buyers – sales & marketing teams can use as a tool to sell the product before it is finished being built
  • In email marketing to prospects – use in marketing emails to tease potential buyers or clients
  • Video marketing campaigns on YouTube or Facebook – share on video platforms to generate interest outside your existing network or community

Time-lapse is a wow factor that sales & marketing teams have as an asset. One that is worth the investment as the end product can be used in many different ways.

5 common misconceptions about long term time-lapse photography  

When it comes to time-lapse photography there are a number of misconceptions that should be clarified before embarking on a time-lapse style project. Here are 5 things you might not have known about time-lapse.

  1. Don’t you take video, not just photos

    Video captures footage in real-time as it happens and records at 25frames/sec or higher. That’s an enormous amount of footage to manage and store over a long period.

    Let’s look at a 6-month construction project as an example:

    Capturing video for 9hrs/day for 5 days/wk over 26 weeks = 1170hrs of footage or 49 days of continuous viewing and to put into perspective the equivalent of 105.3 million images.

    With time-lapse, we’d set the photo interval at say 10mins for 9hrs/day for 5 days/wk over 26 weeks = 7020 images. When we cull rainy and non-productive days we’re left with say 5000 images. Processing them in a video at 25frames/sec gives us a video length of 3mins 20sec. A much more pleasant time-frame to what a video and a much easier process to manage.

    1. Can time-lapse cameras be used for security
    2. Generally not, although it can have a limited benefit for security. Time-lapse photography’s main purpose is to capture and document change over a period of time, taking still images at regular intervals, not continuous video. For long-term projects, this means photos could be taken anywhere between 10-30mins or longer. Therefore, site activity in between these intervals is not captured.

      The other consideration is time-lapse images are captured in high resolution, up to say 24MP, to produce various high-quality outcomes. These images are also uploaded and stored to an online gallery to assist with project management for the duration of the event, activity or construction project. Uploading or storage of hi-res video over long periods is impractical due to the large files sizes. Security footage that is streamed or uploaded is therefore generally low-res and B & W, footage that is stored locally on a hard drive maybe colour. Security footage is also generally only kept for short periods, maybe a week, again due to storage restrictions, then overwritten where time-lapse images are stored from start to finish over weeks, months or years.

      1. You don’t need to de-flicker time-lapse images
      2. This may be true if you are capturing footage over a short time frame and taking images at intervals of secs, like a sunset. But with long term time-lapse where you are capturing footage over days, weeks or months you are going to experience many various lighting conditions (the other exception to this is shooting indoors with controlled lighting with little or no light variations via external windows).

        These varying light conditions result in images with different exposures and when stitched into a video played at normal speed creates a flickering effect. De-flickering of footage using sophisticated software smooths out the light frequency curve by adjusting the exposure of thousands of individual images through batch editing. This makes the viewing experience of the final product much more pleasant.

        1. One camera is enough

        This really depends on the project, desired outcomes, how creative we need to be, and budget. Capturing a mural being painted on the side of a building will generally only require one camera unless the brief requires different angles to be captured.

        Capturing long term time-lapse requires a camera to be static in a fixed location. On a large-scale construction project all activity may not be able to be capture from the one position:

        • particularly where various activities are happening around the site at the same time
        • one thing that’s being construction may block the view of another
        • The project is of a size that it can’t be captured by the field of view of 1 camera
        • The length of the project may require cameras to be placed at intervals

        There are times when 1 camera can work and that’s when the activity is staged which provides an opportunity to move the camera to various locations to capture the relevant activity at the time.

        1. Why do I need a whole time-lapse system, won’t the camera do?

        This may be the case if you are capturing footage over a short period of time, and you are with the equipment, provided your camera has a built-in intervalometer (controls the camera to take photos at regular intervals that you set, amongst other features). An external intervalometer can also be plugged into most modern cameras.

        But for long term time-lapse photography the system needs to be self-sustaining of which there are 3 main considerations:

        1. Weather
        2. Power
        3. Monitoring the system


        It is important to understand how time-lapse works and not get caught up in misconceptions, so we can ensure we use the right equipment and you can get the most out of your investment.

        Got questions, go to our FAQ’s or contact me directly on tony@aerialviewphotography.com.au

Understanding the tech around long term time-lapse: let’s break it down for you

When you think of photography most people’s thoughts are around the use of a single camera. However professional long-term time-lapse photography requires the use of a number of hi-tech components, including hardware and software, that make up a whole system seamlessly working together to achieve desired outcomes.

Here is an overview of the equipment is required for time-lapse photography.

The Camera & Lens:

When choosing a camera for long term time-lapse projects we look for reliability not features. These cameras are placed on a project for weeks, months, and even years so we want to make sure they will continue to operate consistently over those time frames. Nikon and Canon DSLR cameras are the workhorses we use and have proven themselves over time. Camera models capturing images up to 24MP and using a simple set of camera settings over hi-end fully-featured models allows us to keep the cost down for our clients and produce images that provide high-quality outcomes.

Every project is different, and the required field of view will be a major factor in determining lens selection. Therefore, having a standard and wide-angle options in our kit provides flexibility to ensure we can adequately frame up our subject. We use a range of Sigma and Tokina lenses, chosen for their reliability and robustness, down to a 10mm focal length for a wide-angle.

Camera settings also play a key role in capturing long term time-lapse. This a subject for a whole new blog.

Time-lapse Controller:

A state-of-the-art PhotoSentenal platform that is connected to the camera and controls the image capture process, uploads photos to the online gallery via 3G/4G connectivity. This communicates the system health and operations to the control hub triggering alerts if there are any issues.

Equipment Housing:

The IP-66 weather-proof housing accommodates the camera, time-lapse controller and a 13600mAh lithium-ion battery, offering protection to the elements. It has been successfully tested in controlled conditions between -15°C and 60°C. The window of the housing consists of optically pure B270Ò glass, highly resistant to solar radiation and engineered to minimise solar flaring.

Power Supply:

The internal lithium-ion battery is kept charged by a 20W solar panel making the system fully self-sustaining for the life of the project. For indoor or low light applications the system can be connected to 240V AC mains power.

Control Hub & Online Gallery:

Via a secure login, the online gallery allows our clients to:

  • view project photos anytime, anywhere on any device
  • download photos for further use or reporting
  • Share photos to social media channels.
  • overlay and compare photos from different dates and/or times
  • access additional features such as periodically auto-generate time-lapse progress videos.

Via the control hub we manage and configure the system remotely to ensure everything is working as it should, which protects our client’s investment. This includes:

  • the ability to change the shooting regime – image intervals, start & finish time, what days to shoot
  • monitoring real-time data on photos taken, storage space, battery and solar voltage, system messages
  • receiving status alerts via email and SMS

Post-Production:

Now that the project is finished, 000’s of photos have been captured and are processed by highly skilled editors and various software suits to produce a dynamic time-lapse video. The process involves 3 main processes:

  1. Culling – non-productive days (rainy days, no activity etc), and none essential images are culled from the collection. This is to ensure good quality imagery is used and high activity is evident when viewing the video. This will reduce the total no. of images by between 25-40%
  2. De-flickering, Stabilisation, Colour Grading, and Enhancingflickering happens where images are taken with different exposures due to various lighting conditions throughout the day (morning, midday, afternoon, overcast, full sunlight). For example, if the photo interval for our time-lapse is 15mins, one photo could be taken in full sunlight and the next under a cloud. One photo is bright and vibrant, the other dark and dull, with every other photo in the sequence somewhere in between. When these frames are joined to make a video, these varying exposures create a flickering or strobe-like effect. Software is used to smooth out the light frequency curve of the image sequence to minimise the flickering effect and make the viewing experience more pleasing to the eye. Stabilisation is generally required when a camera is not set on a solid object, for example, attached to a high pole, where the pole is susceptible to movement from windy conditions. When the pole sways and one photo is taken in a slightly different position to the next this will create a shaking effect when the photos are joined together in the video. This shaking is removed/minimised in the editing process by using stabilisation features in our software. Colour grading and enhancing footage is a normal part of any post-production process for photography and videography, especially when footage is captured in a raw format, to ensure the final product is delivered to a high standard.
  3. Branding – once the time-lapse video is complete personal branding, to suit a client’s requirements, is added. This may include background music, an into and ending, incorporating company logos, dynamic text at various places, pan/zoom animation etc. etc.

So now you know what equipment is involved, it will help you understand the complexity behind time-lapse photography and may give you a new found appreciation of it.

How does time-lapse photography actually work?

Time-lapse photography is a dynamic way of capturing a project or event, over a period of time and condensing the footage into a short video that can be used as an effective marketing tool.

The time-lapse process involves capturing many individual images taken at regular intervals over a period of time and compiling them into an engaging time-lapse video.

Normal video is also made up of single images as well, filmed at say 25 frames/sec or higher. But when played back at that rate it appears to the human eye to be continuous motion. With time-lapse photography, the capture rate is much slower with images taken in intervals of every few secs or mins. When the images are compiled together, and we now play it back at say 25 frames/sec we are effectively manipulating or speeding up time so an event that takes hours, days, months, and even years can be viewed in minutes.

Put another way:

Normal video: continuous footage captured at 25frames/sec for 1 hour
We are capturing 1 hour of change with 90,000 images.
Played back at the same rate of 25fps the footage takes 1 hr to view.

Time-lapse video: single images captured at say 1frame/minute for 1 hour
We are capturing 1 hour of change with 60 images.
Played back at the rate 25fps the footage takes 2.4sec to view.

The first use of time-lapse photography in a feature film was in Georges Méliès’ motion picture Carrefour De L’Opera (1897). However, the man who can be credited for the development of the form and its current popularity and modern use is in fact a banker, named Dr. John Ott, in the 1930s.

Time-lapse photography has also been instrumental in allowing us to see some of the most influential structures and buildings being constructed. The full stories of construction can only be properly seen when the entire process, from start to completion is time-lapsed. What you’re seeing when you watch one of those videos is effectively a piece of history being made.

For time-lapse examples go to our Gallery HERE

IES Mural Time-lapse Video

Landmark Place in Spring Hill, Brisbane is living up to its name with its new facade. A mural collaboration by Australian artist Matt Adnate and Chinese artist Sheep Chen celebrating the multicultural identity of IES College. Been given the privilege to create a time-lapse video of the amazing artwork, it was a pleasure to work with IES staff and neighbouring property owners, allowing us access to mount our camera. The whole community was excited to see the mural come together, not even the challenging weather conditions could dampen the enthusiasm or delay the progress ready for the launch.

The mural also acknowledges the Campfire Group, a collective of indigenous and Australian artists. It was an honour to be part of this project working with Internation Education Services IES.